You can find a summary of the code updates in this pull request .
Turning a heading into an id may not seem complicated at first glance, but there are some tricky edge cases to consider. Here’s what we’ll need to do:
Step 1: Write helper function
There are two places in the app that will eventually need to create an ID from heading text:
- the
BlogHeadingcomponent (where theidattribute will be added to the heading). That’s what we’re doing in this workshop. - the
ToCcomponent (where the links will be added to each table of contents item). This will happen in the next workshop.
For consistency, we’ll write a function in src/helpers/headings-helpers.ts that can be used in either circumstance. The function will translate a heading React node (for #1 above) or heading MDX (for #2 above) into a heading id.
Transform a heading string into an id
Let’s start by assuming we’re receiving a string, and we’ll make that string into a URL-friendly id.
headings-helpers.ts
export const headingToId = (
  heading: string,
) => {
  return heading
    .toLowerCase()
    .replace(/[^\w\s-]/g, "")
    .replace(/\s+/g, "-");
};
Let’s take a look at that line-by-line. Line 5 will transform the heading to lower case.
Line 6 will remove anything that’s not (^) an alphanumeric character (\w), a whitespace character (\s) or a hyphen (-). More specifically, it will replace any of those with an empty string (""). You can see the MDN Regular Expression cheat sheet for official definitions of \w and \s (and much more!).
Finally, line 7 will transform any whitespace into a hyphen.
Say our heading is “Why travel? It’s fun!“. Here’s what it would look like at each stage:
headings
  .toLowerCase()
    // why travel? it's fun!
  .replace(/[^\w\s-]/g, "")
    // why travel its fun
  .replace(/\s+/g, "-");
    // why-travel-its-fun
This is a good start – we’ll be updating this helper function in a couple ways in the following steps.
Step 2: Account for JSX Heading
We’ll need to call headingToId in src/components/BlogHeading/BlogHeading.tsx, and the argument will be the children prop of the BlogHeading component. However, children is techically a ReactNode , and might not be plain text. Recall the example from Workshop 2 with the heading that had an italicized word, “Style”; that children value might look something like this:
Understanding Your Learning <em>Style</em>We’ll use the react-to-text utility on the children prop to extract the text. First we’ll need to install it:
npm install react-to-textAnd then we can import and apply it in the headingToId function:
headings-helpers.ts
import reactToText from "react-to-text";

// ...
export const headingToId = (
  heading: string | React.ReactNode,
) => {
  const headingText = reactToText(heading);
  return headingText
    .toLowerCase()
  // ...
};Step 3: Add id in BlogHeading
The last step: Add the id to the headings in the BlogHeading component. Here’s what that looks like:
BlogHeading.tsx
import { headingToId } from "@/helpers/headings-helpers";
// ...

function BlogHeading({
  level,
  className,
  children,
  ...delegated
}: BlogHeadingProps) {
  const id = headingToId(children);
  const Tag: "h2" | "h3" = `h${level}`;

  return (
    <Tag
      className={clsx(className, styles[`heading${level}`])}
      id={id}
      {...delegated}
    >
      {children}
    </Tag>
  );
}
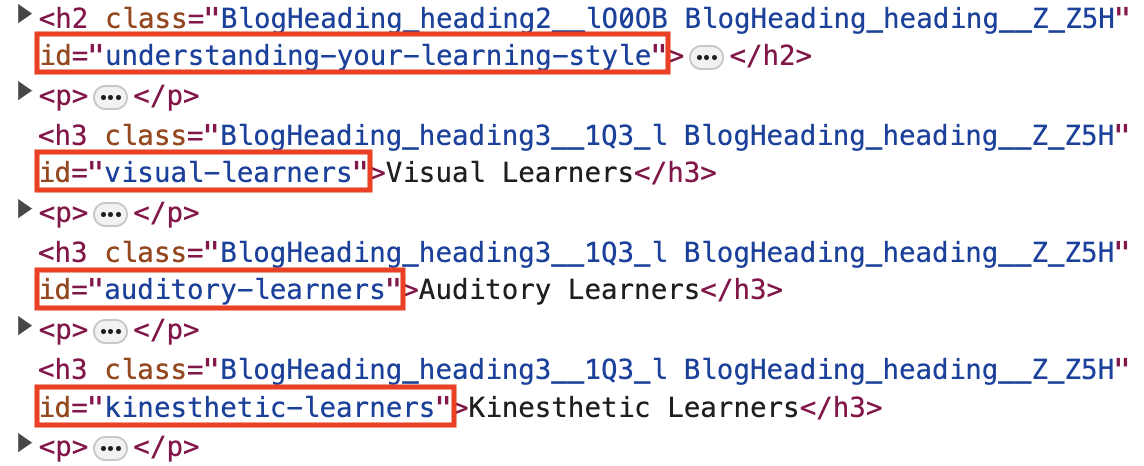
The browser developer tools reveal the heading ids are in place (along with some cryptic CSS Modules class names):

Next up: clickable table of contents links!